If you love camping and cooking, you might want to consider getting a Dutch oven. A Dutch oven is a versatile piece of cast iron cookware that can be used for a wide variety of camp meals, from soups and stews to breads and cakes. You can use it over a campfire, on a tripod, or smothered by coals.
In this article, we will show you how to use a Dutch oven for camping and what tools and setups you need to make the most of it.
Why Are Dutch Ovens Good for Camping?
Dutch ovens are made of cast iron, a durable and heavy-duty material that can withstand high temperatures and rough handling. Cast iron also retains heat well, which means your food will stay warm for a long time after cooking. Because of its seasoning, it can create a natural non-stick seasoning over time, which makes cleaning easier and adds flavor to your food.
One of the main advantages of using a Dutch oven for camping is that you can use it over different heat sources, such as campfires or coals. You can also stack multiple Dutch ovens on each other, saving space and allowing you to cook different dishes simultaneously. For example, you can have a pot of chili on the bottom, a cornbread on the middle, and a cobbler on the top.
Another benefit of using a Dutch oven for camping is that you can cook various dishes with it, from savory to sweet. You can fry, bake, roast, or simmer your favorite dishes in this cookware. The possibilities are endless!
Which Type of Dutch Oven is Good For Camping?
There are two types of Dutch ovens: enamel-coated and bare cast iron. The enamel-coated one has a layer of ceramic glaze that protects the cast iron from rusting and gives it a smooth and colorful surface. The bare cast iron one has no coating and a dark and rough exterior.
The best type of Dutch oven for camping is the bare cast iron one. The enamel coating is not strong enough to handle the high temperatures of campfires and coals. It can crack, chip, or peel off if exposed to direct heat or rapid temperature changes. The coating can also be messed up by the dings and dents of camp life. On the other hand, the bare cast iron can take on any amount of heat without any damage, and there is no expensive enamel coating to “baby” around the camp.
Moreover, the bare cast iron Dutch oven often stands on three small legs, which helps prop it up over a bed of coals. This allows air to circulate under the pot and prevents scorching. The lid also has a rim around the edge that keeps the coals from falling off when you lift it.
Other Tools You Need for Camp Dutch Oven Cooking
Besides the Dutch oven, you need other tools to make camp cooking easier and safer.
Campfire Tripod
A campfire tripod is a metal stand with three legs and a hook at the top. You can use it to hang your Dutch oven over a fire pit or a grill grate. This way, you can adjust the height of your pot by raising or lowering the chain that connects it to the hook. You can also swing your pot away from the fire when you need to check or stir your food.
Charcoal Tongs
Charcoal tongs are long metal tongs with curved tips that fit around charcoal briquettes. You can use them to pick up hot coals from the fire and place them under or on top of your Dutch oven lid, allowing you to control your pot’s temperature and heat distribution without burning your hands.
Heat-resistant Gloves
Heat-resistant gloves are made of materials that can withstand high temperatures without melting or catching fire. You can use them to handle hot pots, lids, tongs, or other tools without hurting yourself.
Lid Lifter
A lid lifter is a metal tool with a hook at one end and a handle on the other. You can use it to lift your Dutch oven lid without touching it with your hands or gloves. This lets you avoid getting ash or dirt on your food or dropping your cover on the ground.
Trivet
A trivet is a metal rack with three legs and a flat surface. You can use it to place your hot pot on after cooking without damaging your table or ground. It also allows air to circulate under your pot and prevents condensation from forming.
Dutch Oven Camp Cooking Setups
There are different ways to use a Dutch oven for camping, depending on the type of heat source and dish you want to cook. Here are the three common setups you may want to try next:
Over a Fire Pit
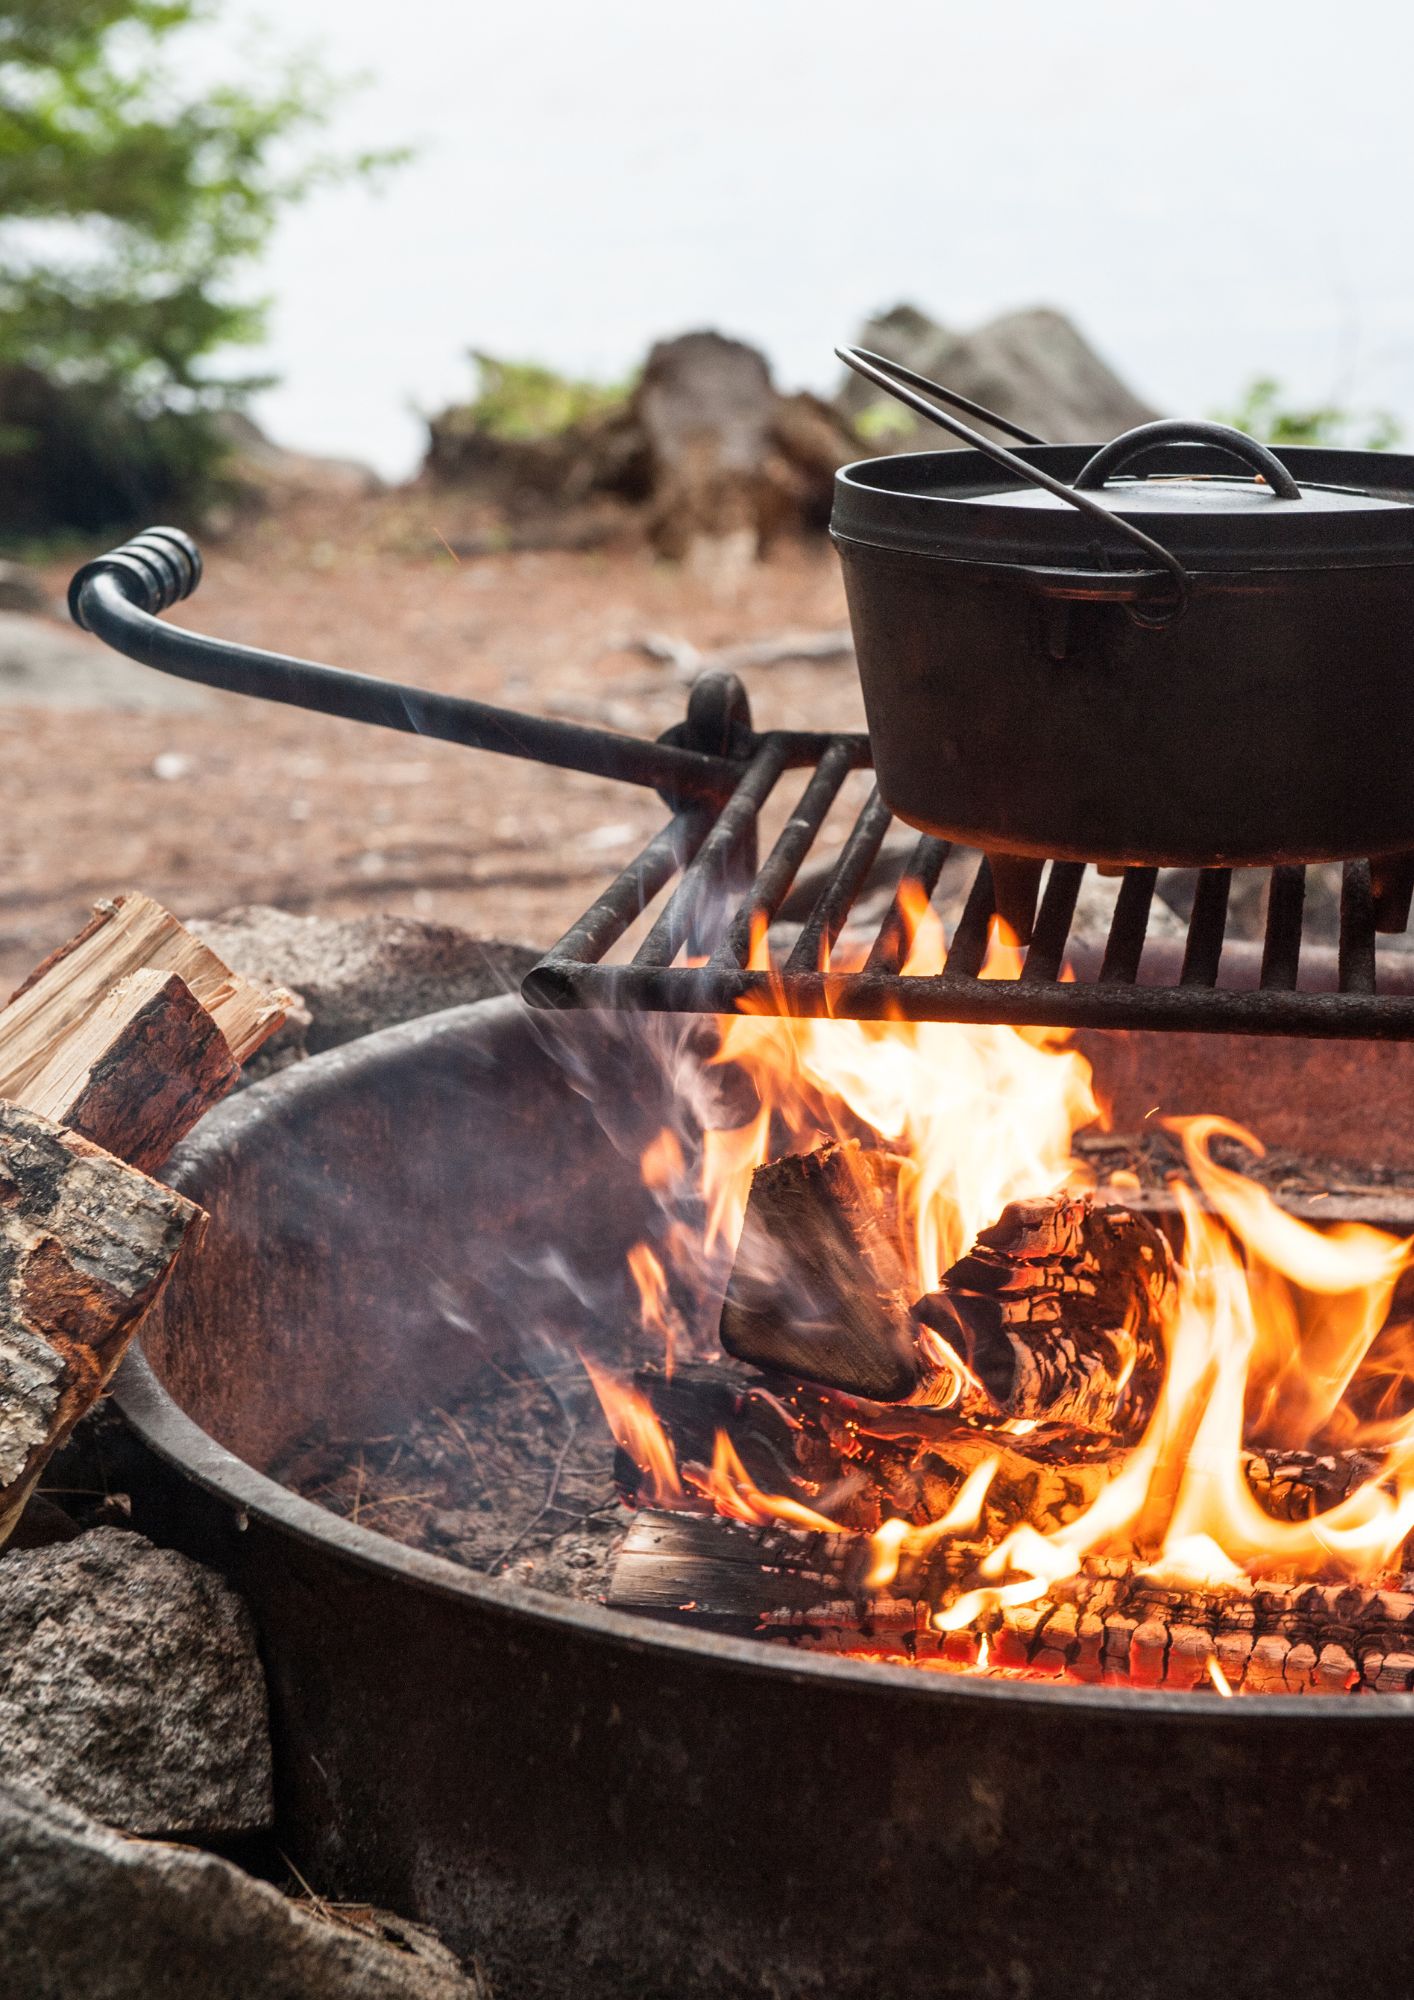
This is the simplest and most traditional way to use a Dutch oven for camping. All you need is a fire pit and some firewood. You can either place your pot directly on the fire or on a grill grate over the fire. This method is good for dishes that require high heat and constant stirring, such as soups, stews, or fried foods.
You can adjust the temperature by adding or removing firewood or coals or moving your pot closer or farther from the fire. You can also use a lid lifter to check or stir your food without disturbing the coals on the lid.
Hanging on a Tripod
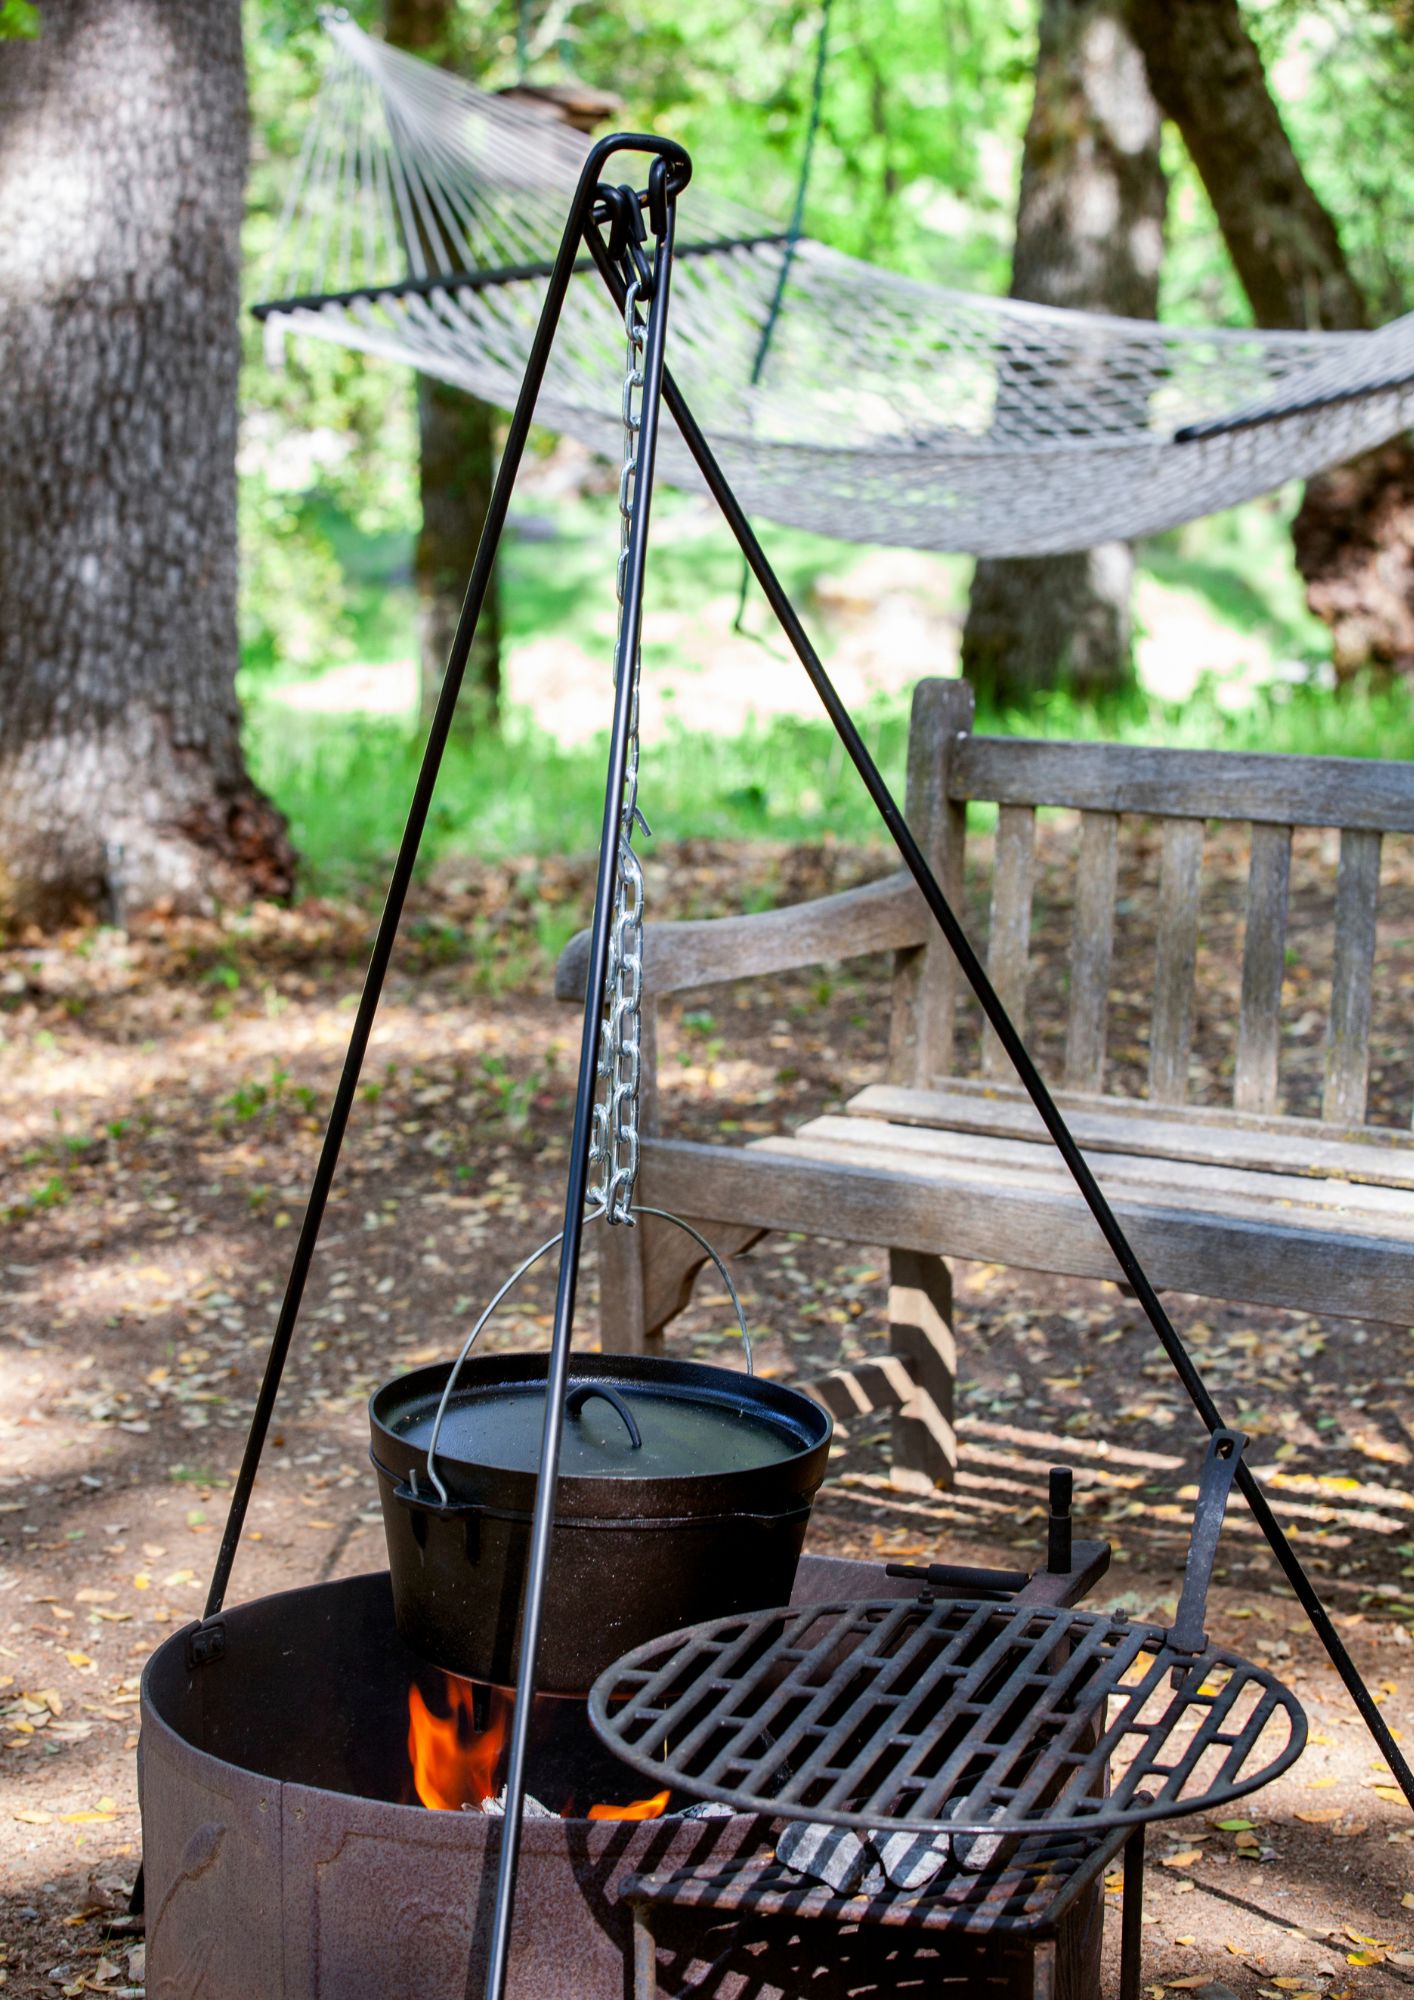
With a campfire tripod and some rope or chain, this method can give you more control over the heat and height of your pot. Use this technique for dishes that require low to medium heat and occasional stirring, like roasts, braises, or casseroles.
First, set up your tripod over your fire pit or grill grate. You can either buy a ready-made tripod or make your own with three metal poles and some wire. Attach a hook at the top of your tripod and a rope or chain at the bottom of your pot. Then, start a fire with tinder, kindling, firewood, or charcoal briquettes. You can follow the same steps as in the previous method.
When you get a stable fire, hang your pot on the hook of your tripod. Adjust the height of your pot by raising or lowering the rope or chain, and swing your pot away from the fire when you need to check or stir your food.
Smothered by Coals
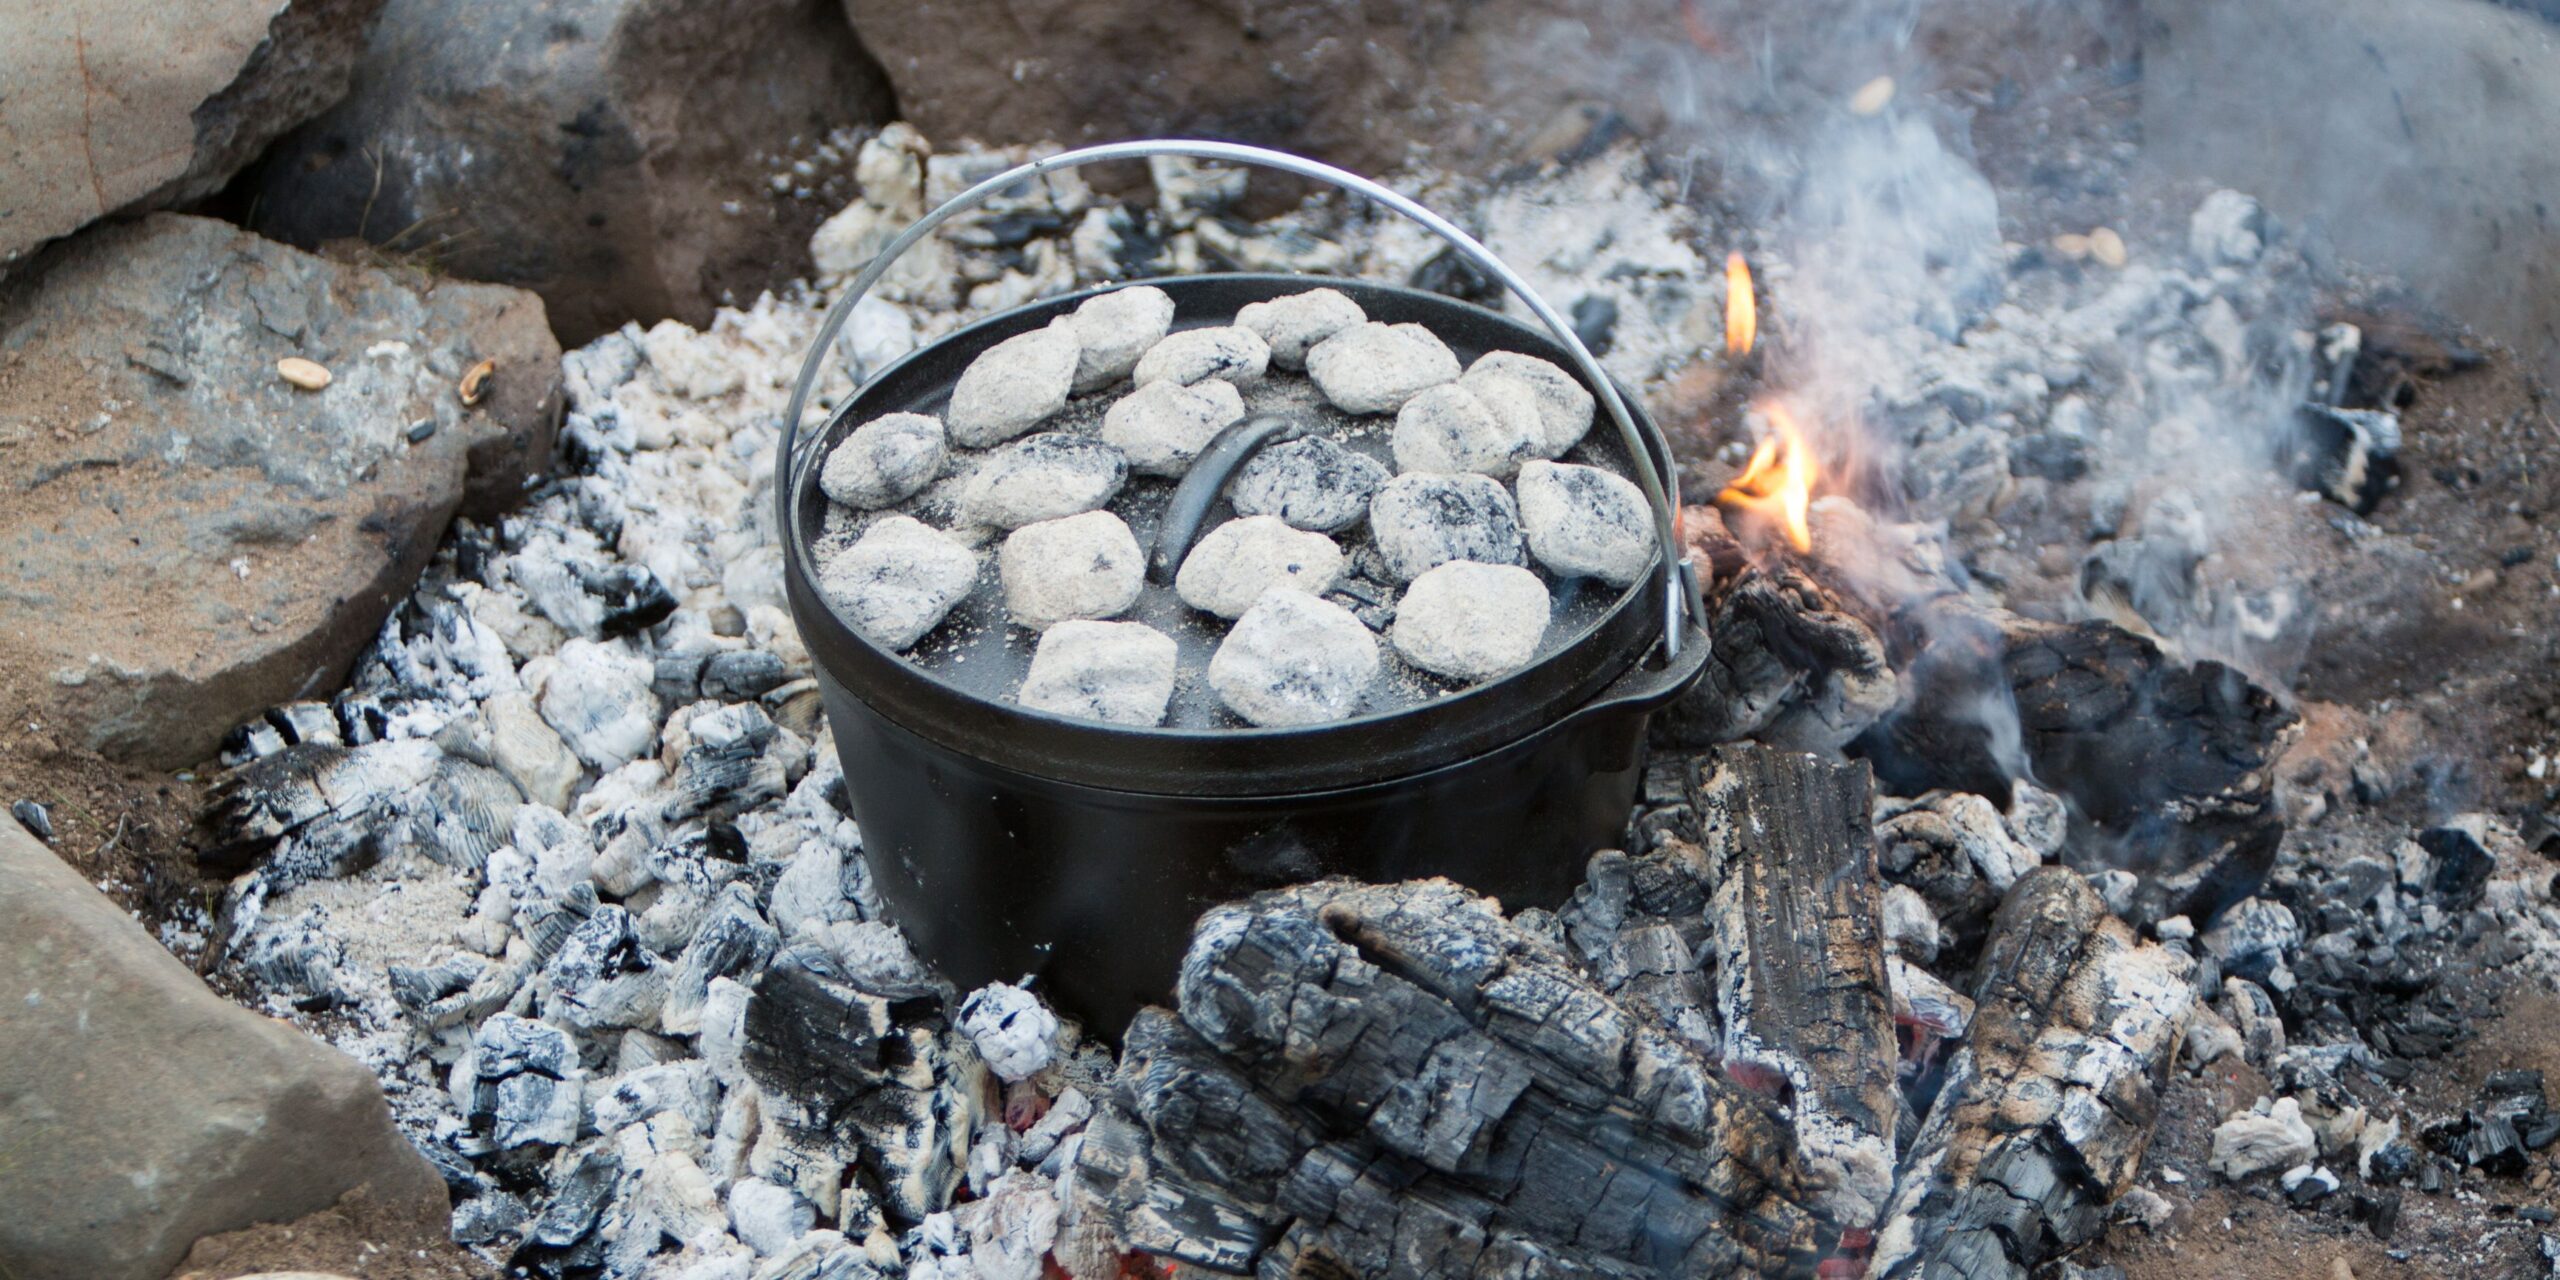
This is the most advanced way to use a Dutch oven for camping that turns it into an actual oven. In this process, you’ll need coals and some ash. You can use this for dishes that require even heat from all sides and no stirring, such as breads, cakes, or pies.
Prepare coals from your fire pit or grill grate. You can either use charcoal briquettes or hardwood coals that have burned down to glowing embers. Lay an ash bed flat near your fire pit or grill grate. This will act as insulation and prevent the heat from escaping to the ground. Afterward, form a ring of coals over the ash slightly larger than your pot.
Place your pot over the ring of coals and cover it with its lid. Then, cover some more coals on top of the lid with more ash to create an oven-like environment for your pot, cooking your food evenly from all sides.
Rotate your pot every 15 minutes to prevent hot spots and ensure even cooking. Use a lid lifter to avoid disturbing the coals, and check your food for doneness.
A Quick Guide to Dutch Oven Cooking with Charcoals
While charcoal is convenient and consistent, it requires adjustments and calculations. If you want to use charcoals instead of firewood for your Dutch oven cooking, below are some tips to make it work.
Cook with embers
Charcoals are good fuel for Dutch oven cooking, but you need to use the embers, not the flames. Embers are the glowing coals right after the fire dies down, giving steady and even heat for cooking. Meanwhile, flames are unpredictable and can cause extreme hot spots that burn food inside the pot.
To get embers, light your charcoals 15 to 20 minutes before cooking. You can use a chimney starter, a metal can with holes, and a handle to light them easily. Dump the glowing charcoals out and use them for cooking.
Charcoal placement is key
Another thing to remember when using charcoal is to place it strategically under and over your pot, depending on what you want to cook. Putting coals directly below the Dutch oven is good for boiling or frying but too hot for baking. Arranging the coals in a ring around the outside of the Dutch oven provides much gentler heating.
Place more coals on top of your lid than under your pot to bake with charcoals. This will create a convection effect that will circulate hot air inside your pot and cook your food evenly. A good rule of thumb is to use twice as many coals on top as on bottom.
Use fewer coals than you think is needed
One of the common mistakes that beginners make when using charcoals is to use too many of them. This can result in overcooking, burning food, or wasting fuel. A better approach is to use fewer coals than you think is needed and adjust as you go.
However, you may need to adjust it depending on other factors, like the weather, wind, altitude, or type of food. To remove the guesswork, use a kitchen thermometer to check the temperature inside your pot and add or remove coals accordingly.
Elevate your baking tray with a trivet
When baking with charcoals, you may encounter a problem: the bottom of your food may burn before the top is done. This is because the heat from the coals below is too direct and intense for delicate baked goods. Elevate your baking tray with a trivet inside the Dutch oven to solve this.
Doing so will create space between your food and the coals below, preventing scorching. It will also allow hot air to circulate under your food and cook it evenly.
Rotate the Dutch oven to remove hot spots
Using charcoal may also create hot spots on your pot or lid that can affect your cooking, causing uneven cooking or burning of your food.
To avoid this, rotate your pot every 15 minutes to even out the hot spots. You can do this by turning the bottom one way and the lid the other way to balance out the heat from all sides and ensure even cooking.
Stack Dutch ovens to cook multiple courses at once
One of the coolest things you can do with charcoals is stack multiple Dutch ovens on top of each other and cook different dishes at once. This will save you time, space, and fuel, allowing you to create a complete meal in one go.
Place some coals on top of each lid and under each pot. Ensure each has legs that fit into the rim of the cover below it to create a stable and secure stack that will not topple over.
Feel free to mix and match pots of different sizes and shapes as long as they fit together. With this method, you can cook anything from appetizers to desserts and impress your fellow campers with your culinary skills.
How to Clean a Dutch Oven While Camping
Cleaning a piece of cast iron like Dutch ovens while camping is not as hard as it may seem if you follow these simple steps:
- Clean your pot immediately after cooking. This will prevent food from sticking and hardening on your pot, making cleaning easier.
- Use hot water and a stiff brush or scraper to remove food residue. You can use soap or detergent as long as it is not lye-based. If you have stubborn bits of food, boil some water in your pot and scrape them off with a wooden spoon or spatula.
- Rinse your pot well with clean water and dry it thoroughly. Don’t leave your pot wet; it can rust or grow mold.
- Apply a thin layer of cooking oil to your pot and lid. Getting the insides and outsides of your cookware will restore its seasoning and protect it from rusting or cracking.
- Store your pot in a cool and dry place. When possible, keep it in a cloth bag or cardboard box. Don’t store your pot in a plastic bag or a sealed container; they can trap moisture and cause rusting or molding.
Make the Most of Your Dutch Oven on Your Next Camping Trip
Using a Dutch oven for camping is a fun and rewarding way to enjoy outdoor cooking. You can make delicious dishes with minimal equipment and ingredients and impress your fellow campers with your culinary skills. You just need to know how to use a Dutch oven for camping and what tools and setups you need to make the most of it.
If you want to learn more about Dutch oven cooking (or cast iron cooking), you’re in luck! We have more content for you here at the Cult of Cast Iron. Find more articles and guides about this amazing cookware and discover the history, science, and culture behind cast iron and why it’s the best choice for cooks and cooks-at-heart.
Scroll through our blog now and start your cast iron journey today!

Miguel is a cast iron enthusiast from Cavite, Philippines. He works in the digital marketing field as a content marketing strategist. On the side, he manages a small online bookstore and tends to his plants.